“There is no enlightenment outside of daily life.”
~Thich Nhat Hanh
Summer Share Box 4 Crop List
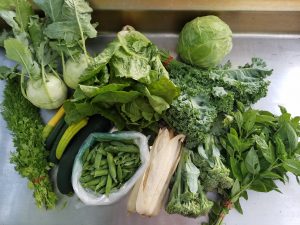
Clockwise, starting with Romaine:
- Romaine Lettuce – All shares

- Green Cabbage – All shares
- Green Kale – All shares
- Basil – Full and Single shares
- Broccoli – All shares
- Popcorn – Full Shares
- Shelling Peas – Full and Single shares
- Summer Squash/Zucchini – All shares
- Cilantro – All shares
- Kohlrabi – All shares
Not pictured:
- Radishes – Half shares
- Garlic Scapes – Single and Half shares
- Raspberries – Full Twin Cities shares
Farmer Notes
- It finally looks to be drying out in the fields after 31” of rain this year so far when the normal is 14”!
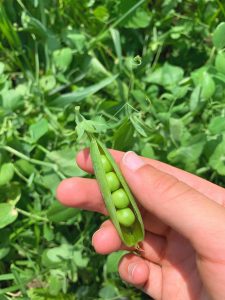
- The shelling peas this week and next week you need to remove the peas from the shell before eating them. We will have some Sugar Snap peas later in the summer where you can eat the entire pod.

- Raspberries are just getting started so everyone will get some over the next several weeks.
- Last of the broccoli for the spring, cauliflower is up next week.
- The cilantro is starting to flower, but there are plenty of good leaves and stems to season several meals.
- Basil is a decent bunch to make some pesto, keep it in a glass of water on your counter.
- Welcome to summer squash and zucchini – grill it, slice it and put it in a pan to sauteé, have it in a cold salad, or just eat it raw like a carrot. Make zoodles or bread or whatever your heart leads you!
- Garlic scapes are like green garlic and can be sliced thinly to season most any dish.
- Cabbage is the ‘crop of the week’ and will be seen in the next several deliveries. Put it into a pan with butter, salt and pepper, make some sauerkraut, put it in a crock pot with some meat, or slaw it up!
- Always wash the produce before you eat it and please return our boxes and ice packs. 🙂
This is part of an article by Rebecca Bratten Weiss that I read this week. I hope you enjoy it. ~Norm
“What I do, by contrast, is eco-gardening. This is like organic gardening, but distinct in several ways. Organic growing has become regulated to the extent that growers are often obliged to worry about rigorous guidelines, not all of which take into account ecological impact. Thinking ecologically about my gardening means dwelling less on the letter of the law, more on sustainability and the long-term relationship between grower and garden, garden and ecosystems, ecosystems with the world. Imagine a set of concentric rings rippling outward, rather than a list of regulations.
The debate over organic versus conventional often skips over the crucial importance of local. An organic tomato may be nutritious and pesticide-free, but it may also have traveled hundreds of miles to arrive on your table, leaving a considerable carbon footprint. And it may have passed through several market intermediaries, so the grower gets less and the buyer pays more. And the final product? You get a fruit variety developed for durability, not flavor. It was picked early, under-ripe, so as not to spoil on its journey. And its nutritional value will have been depleted, depending on the length of time between harvest and consumption.
Locally grown food means that bonds of community are formed between the grower and the buyer. You know where your food came from, and whom you are supporting when you buy it. Eating locally creates unity on a biological level, too: when I and my customers are all, in our respective homes, sitting down to meals made from the same produce, from the plants in my garden, the same nutrients from the same organism are becoming a part of our own cellular structure. The plants we eat literally bind us together.
But it is also crucial to consider how local events and conditions influence the broader global community. It is impossible for me to draw a circle around my immediate community and say “us only.” Our global connectivity is evident in something so simple as the heirloom crops we grow: peppers from Thailand and Mexico, tomatoes from Russia and Italy, cucumbers from France and Israel. I have access to these seeds because of the labor of growers across the world, in eras long past, and remote cultures. My harvest connects me with people far away and long dead. The only language we share, in most cases, is the language of the garden, the silent communion with earth and all its living things.”
Crop of the week – Green Cabbage
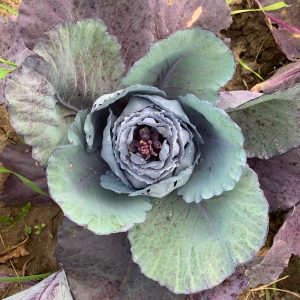
Green Cabbage is a leafy green crop that is well known for its dense-leaved heads. This veggie is part of the brassica family and is a descendent of the wild cabbage. It ranks high in nutritional value, containing a good supply of vitamin K, vitamin C, and dietary fiber. The heads typically weigh somewhere between 1 to 9 pounds! Cabbages can be prepared in many different ways for eating; they can be pickled, fermented (made into sauerkraut), steamed, stewed, sauteed, braised, or eaten raw.
Some recipes to try:
[ultimate-recipe id=”6642″ template=”default”][ultimate-recipe id=”6649″ template=”default”][ultimate-recipe id=”6651″ template=”default”]


